


![]() FreePPP
Setup
FreePPP
Setup
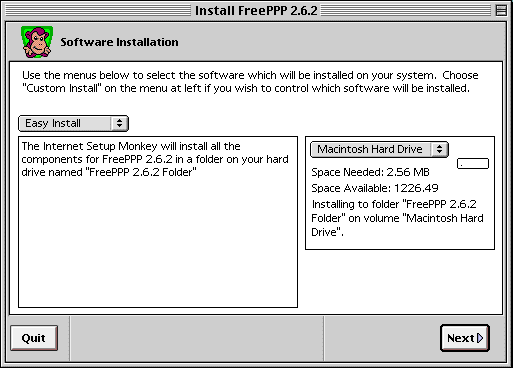
After your system has restarted, you should see the "FreePPP 2.6.2 Folder" on your desktop. Double click to open the folder and then click on the FreePPP Setup icon. The following window will appear:
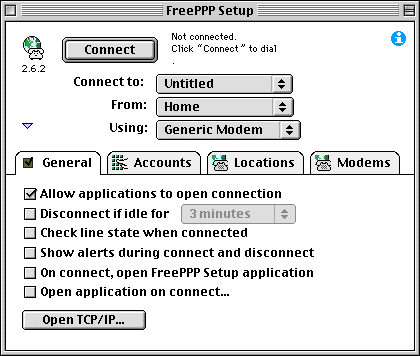
Click on the Accounts tab. The window will change as follows:
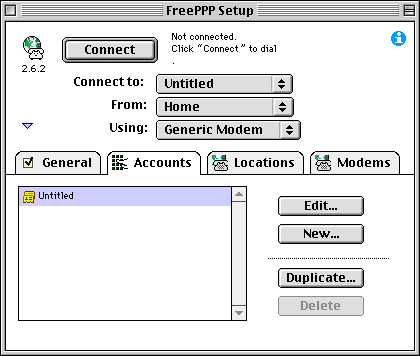
Click on the New button. You will see the following window:
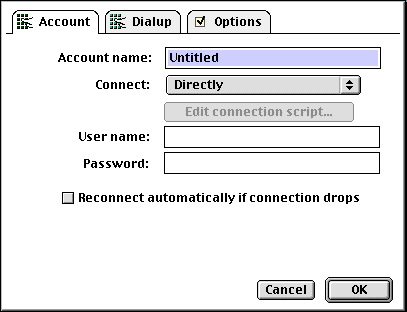
Fill in the fields as shown below:
*Note: Whenever you see the arrows next to a field, as in the connect field, this indicates a drop-down menu. Simply hold your mouse over it to show the choices and highlight the one you want.
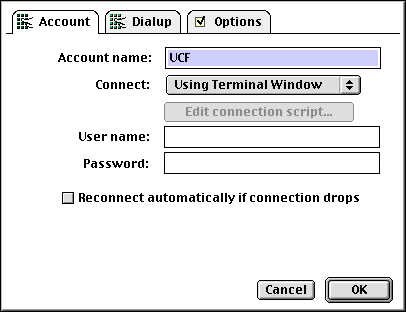
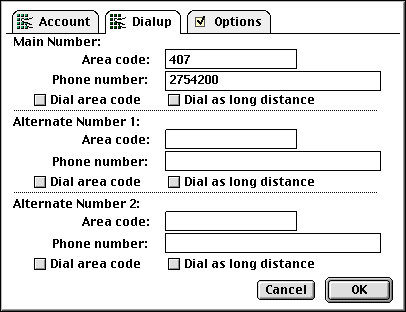
Click on the Dialup tab. Fill in the the Area Code and Phone Number fields according to the table below:
|
Main Campus (ten digit dialing is in effect) |
students: (407) 235-4201 faculty and staff: (407) 235-4220 |
|---|---|
|
Brevard Campus (ten digit dialing is in effect) |
|
|
|
|
For example, if you are connecting to the Main Campus, the window would look like this:
Click on the OK button. You will return to the Accounts screen where you should see the UCF account you just created. Now click on the Modem tab, and then click on Generic Modem on the left. The following window will appear:
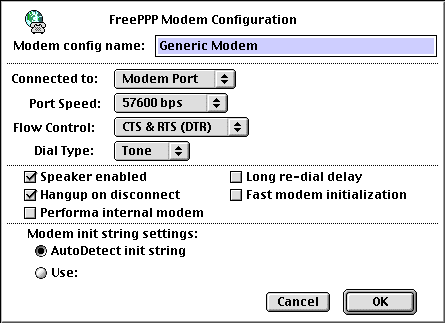
Normally, you should use the default settings in this window. If you experience difficulties with your modem, you can change the modem initialization string by clicking on the Use: button and typing in either AT&F or some other initialization string appropriate for your modem (consult your modem"s documentation for more details). When you are finished, click on the OK button. You will return to the General window.
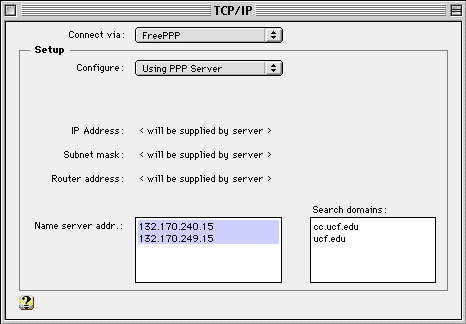
Now click on the General tab, and then click on the Open TCP/IP button. A window will appear as shown below. Fill in the fields as follows:
| Connect via: | FreePPP |
| Configure: | Using PPP Server |
| Name server addr.: | 132.170.240.15 132.170.249.15 |
When you are finished, click on the small square located in the upper-left corner of the window. You will be asked
if you want to save the changes for the current configuration, click on the Save button.

You are now ready to connect to the campus network. Click on the connect button at the top of the FreePPP Setup box. You should hear your modem dial and connect to the terminal server. After a successful connection, a box will appear. Fill in your userid and password when prompted. Note: You will not see your password as it is entered. At the as5100-xx> prompt, type ppp. Below is an example screen:
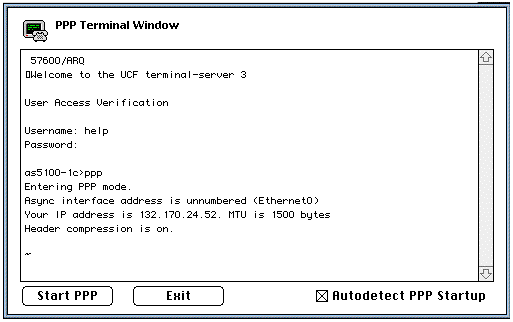
Make sure that the Autodetect PPP Startup box has an "X" in it. If not, click on the box and an "X" will appear. With this box checked, FreePPP will automatically detect when PPP communications have begun. You can start PPP manually by clicking on the Start PPP button as soon as you see garbage characters at the bottom of the window. When the button at the top of the FreePPP Setup screen changes from Connect to Disconnect, PPP communication has been successfully established. You may now use any TCP/IP software, such as a web browser.
When you are finished and wish to disconnect, click on the Disconnect button at the top of the FreePPP Setup box.
